
Classic Corporate Portal Setup
The purpose of this documentation is to detail out the steps for connecting a Classic EB venue's primary rental space to their corporate administrators view. The goal being that the corporate group will be able to see availability at multiple venues all at once and can assist in planning and routing. You will need access to LastPass to view information on the buckets as well as a root login to the classic servers, please talk to your supervisor if you currently do not have access to these utilities.
Definitions
- Corporate Reporting - The entire system used to gather and relay event data from individual venues to users
- Corporate Bucket - The storage used to hold the event data which is then made available to users
- Corporate View - The end users view of the event data for each venue
Setting up the Corporate Link
The first step in this process is setting up the corporate link on the venue.
- Open root on the appropriate server for the venue that you are adding
- Search for and open the admin page for the venue
- Click the CorporateHack tab and click the Add link
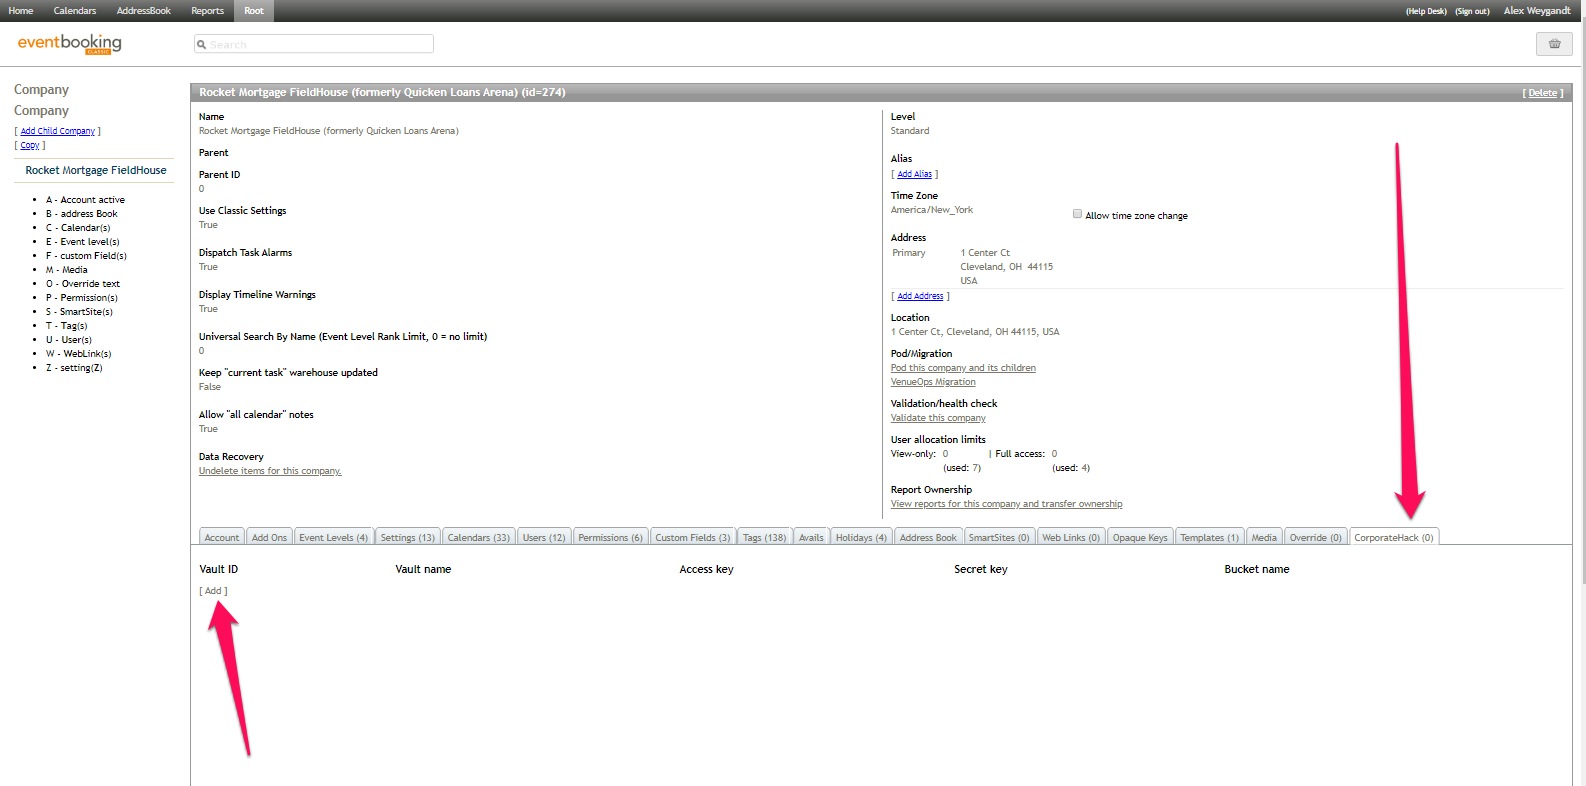
- Four pieces of information will be needed and it can be found in LastPass under the corporate bucket name (ie. corporate-reports-globalspectrum)
- Vault Name (will be the same as the Bucket Name)
- Access Key
- Secret Key
- Bucket Name
- This gives the account the access to send event data to their corporate group
Adding Space(s)
Once the account has been given access to send data to the corporate bucket you must setup each space (usually the primary space like the arena floor) that will transmit its data.
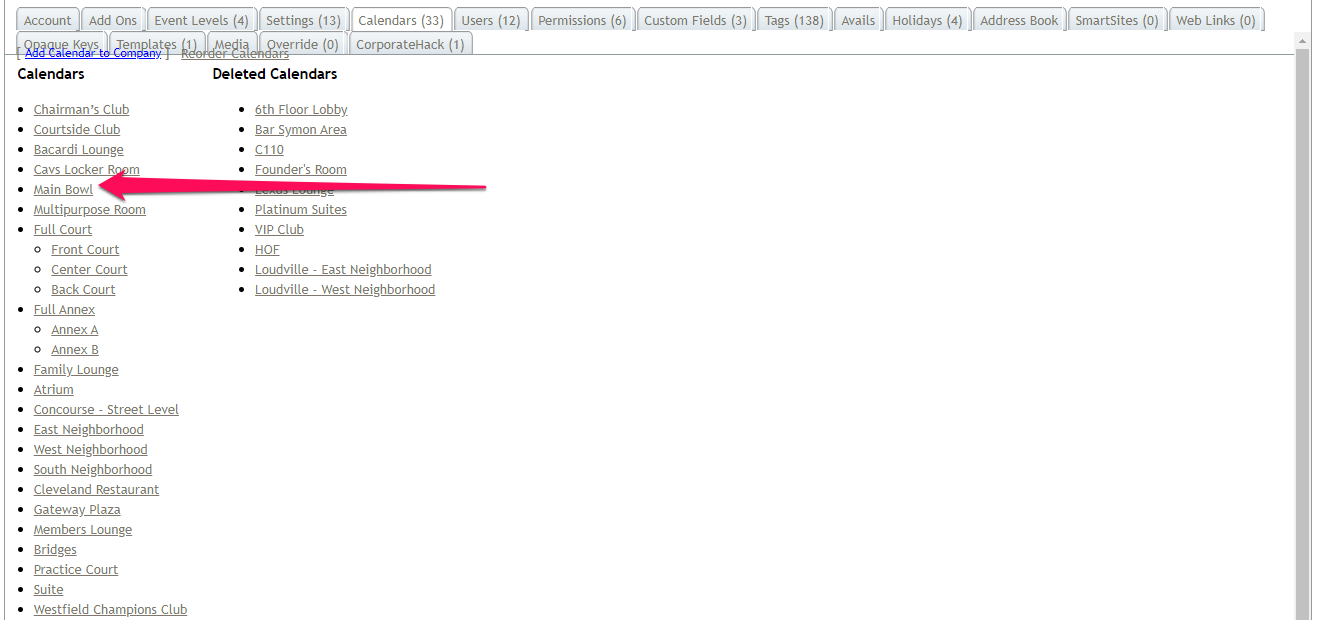
- On the root admin page for the account click on the Calendars tab
- Click on the calendar who's data will be shared
- Click the CorporateHack tab and click the Add link
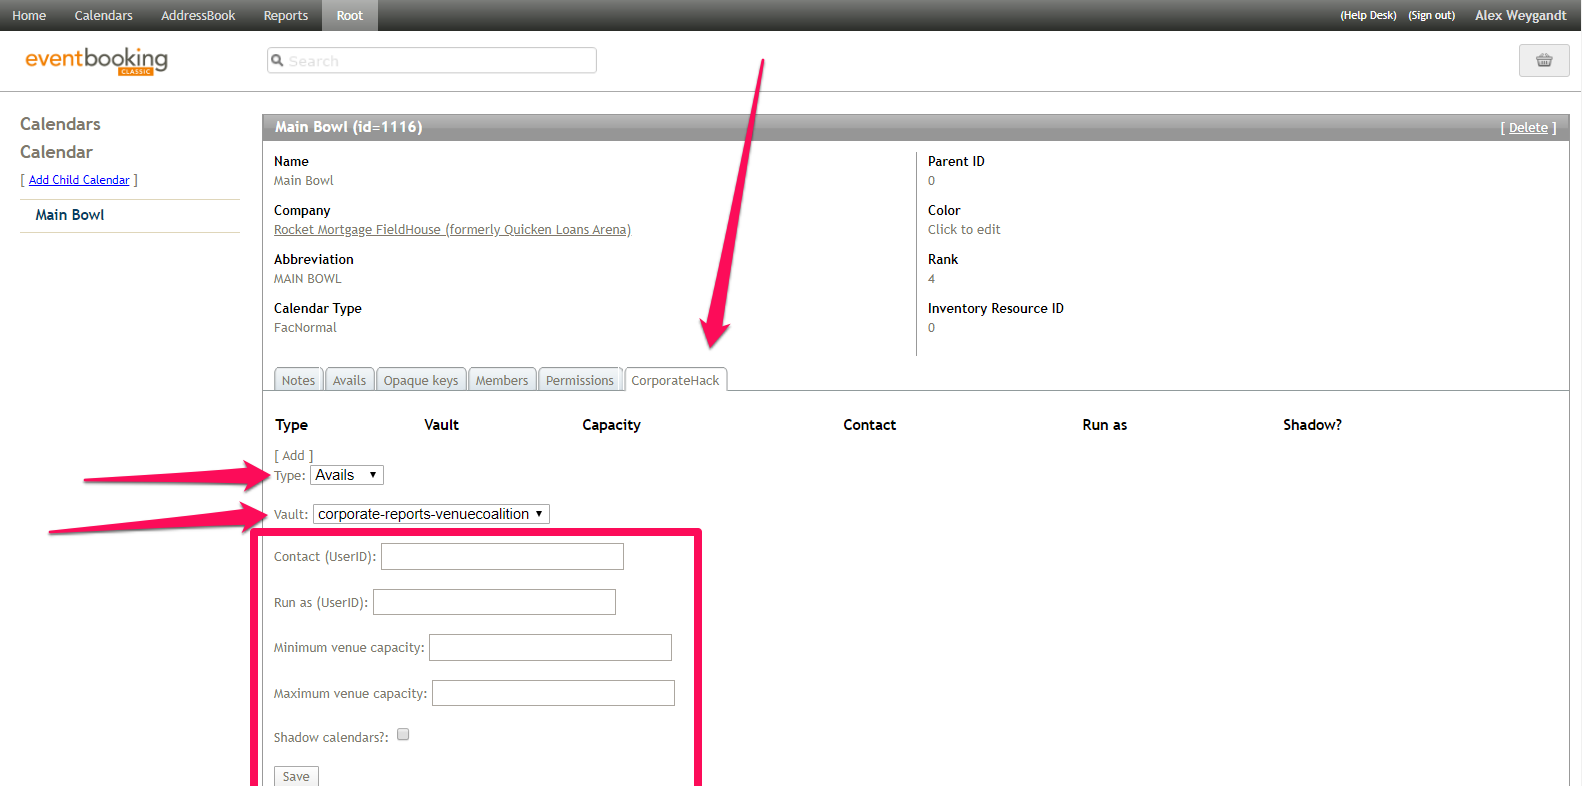
- Four pieces of information will be needed
- Contact User ID (ID number of the venue primary contact)
- Run As User ID (always the EB login ID number)
- Minimum Venue Capacity (always 1) *Note: do not put any commas in the number
- Maximum Venue Capacity (you can find this by searching the venue online) *Note: do not put any commas in the number
- Make sure to repeat the step so that both the Avails and Internal types are setup.
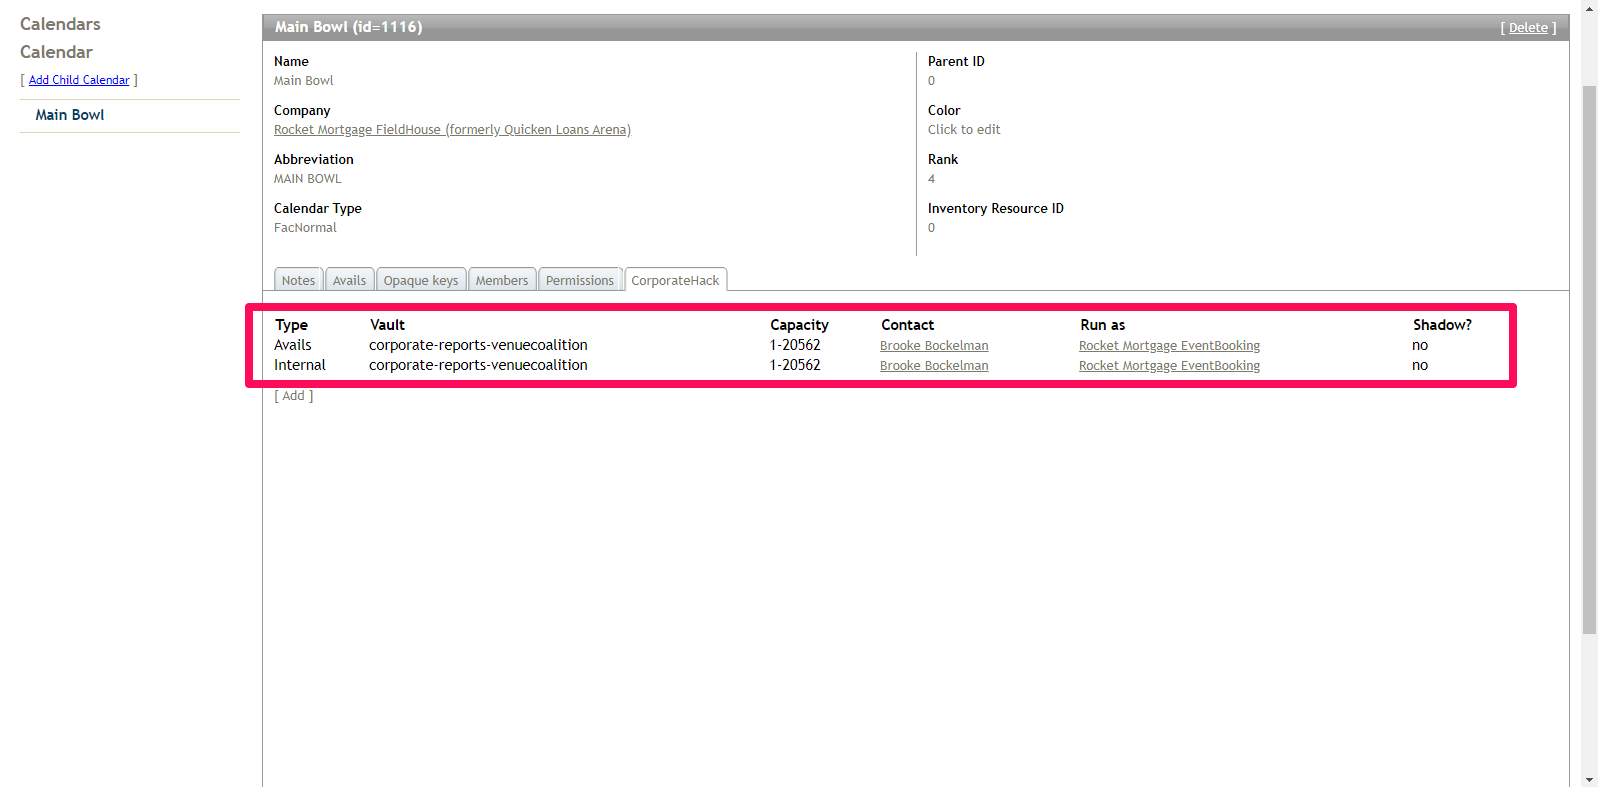
- Once this calendar has been added to the bucket its data should appear after a 24 hour period for any user who has access to the bucket
Verify Data
To verify if the data is being sent you will need to sign in as the user.
- Signed in as the user hover over the Calendars option in the top menu
- Select Corporate View which is the last option on the menu
- The list of spaces will apper on the left hand list, select the one you added yesterday
- Scroll through several months to verify if data is appearing
Relabel Entry in Corporate View (optional)
- After verifying the users data mouse over their name in the upper right hand corner
- Select My Settings from the menu
- On the left hand menu select Corporate View to see the list of all spaces
- Click the Edit link
- In the pop-up box locate the space you had setup
- Rename the space to have the venue name and the building type (ie. Sames Auto Arena) and save the change
- If needed you can click the Edit link and reorder the list (optional)
Troubleshooting
- If data does not show up for a venue then, unfortunately, the process will have to be restarted. Delete the settings on the Calendar(s) then remove the corporate setup on the account.
- If a name for an event does not show up but others do for the same status then the individual events Avails settings have been changed. The venue will need to update this. The venue contact can open the event in question so they can view the detalis page and the Avails settings are usually situated at the bottom of the left hand column under the Status and Event Type fields.
Comments
0 comments
Article is closed for comments.