
CLASSIC POD EXPORT-IMPORT
As clients shift and change ownership it is necessary to migrate them off of one server and onto another. The classic POD was developed as a way for the Client Success team to export and import clients without the need for involving the developers or the tech group.
The POD process consists of two parts, one is running a test POD to make sure that the data will migrate without issue (verified by the client) and then the final POD which will need to be scheduled with a cut off time with the client.
Before you do anything else please make sure to copy the POD project for the client you are working with.
https://app.asana.com/0/36155558414601/36155558414601
Make sure that you update the document on this sub-task and send to the client for review and attach the signed copy back to the task before closing it.
https://app.asana.com/0/36155558414601/156443597113853/f
TEST THE EXPORT (applies to test/final pod)
First, you will want to run a test export of the data from the Staging servers. The benefit of using the Staging servers is that you can perform this portion during work hours. This data will be a few days behind so just make sure the client is aware when they go to verify the test import. Here is a list of the staging servers and you will want to select the one that the client resides on.
http://staging-list.ebconnection.com/
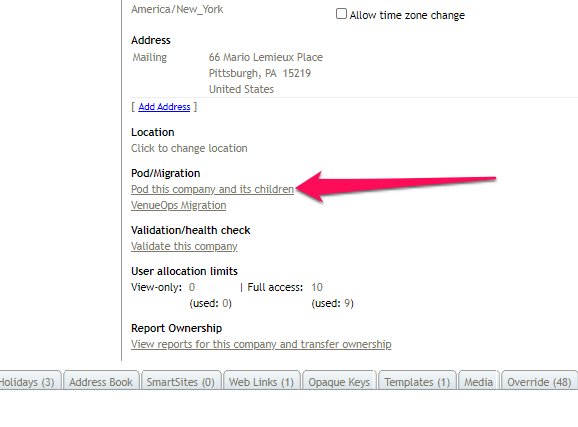
Locate the client and open the company detail page. On the right-hand side of the page is the option "Pod this company and its children". If the company is in a hierarchy (ie. ASM) then go one level up the hierarchy before PODing. In a hierarchy, it is possible for the address book and Tags to be one level above the company and you do not want to miss them. Click on the option.
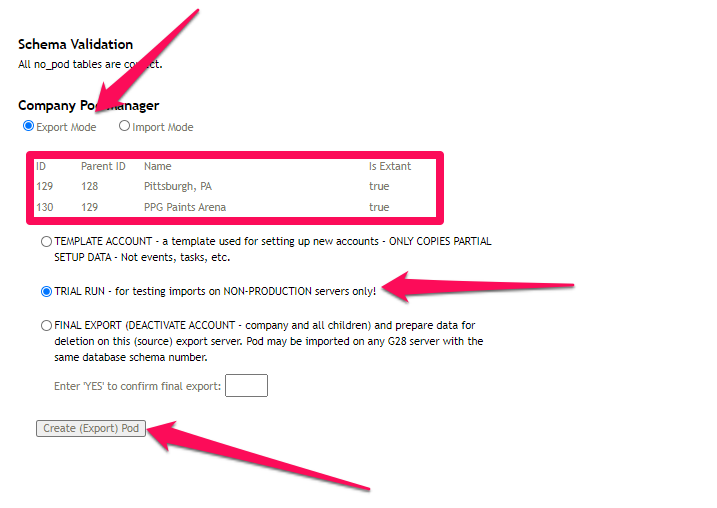
On the export page make sure that the Export Mode is selected, verify the company (and parent if applicable), ALWAYS select the Trial Run option and nothing else!! Then click the Create (Export) Pod button and let the process run. When it is finished it will generate a URL for the Zip file that contains all of the client's data.
START THE TEST RESTORE
Reference the new instance the the client is moving to and go to the staging server that matches that
The test server for all of our PODs is PoddyMcPodFace - https://poddymcpodface-twixt.eventbooking.com/
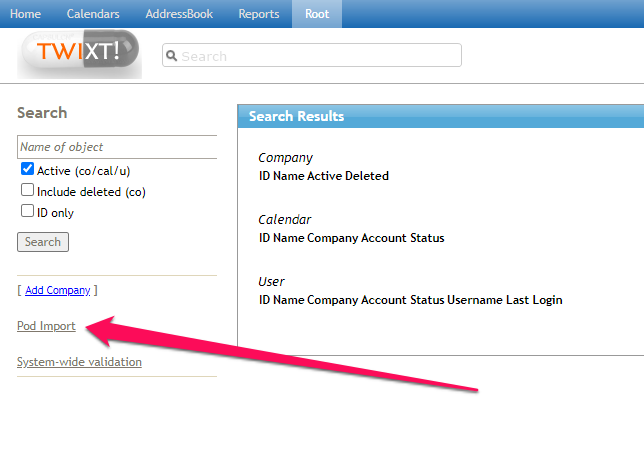
Sign in and go to the Root -> Search page. Here you will find a link for the Pod Import.
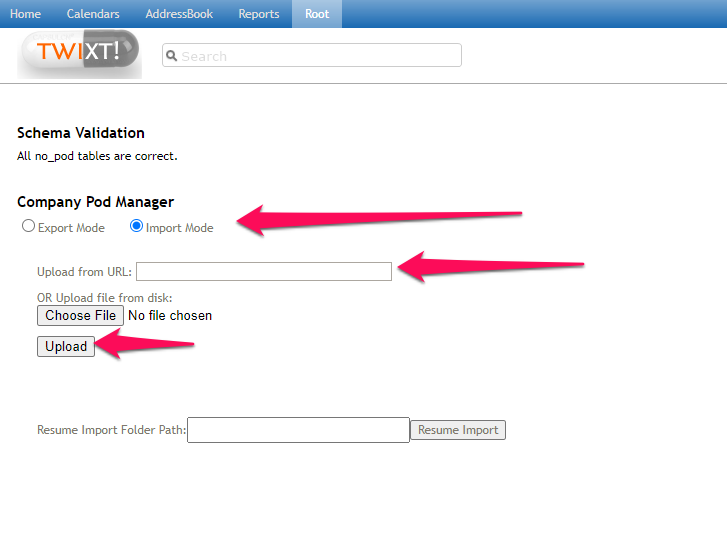
Make sure that the Import Mode is selected, paste the URL for the Zip file you previously created and click the Upload button.
The system will then give you the venue name (make sure you verify) and then you can select to import the data. (may take a moment to appear)
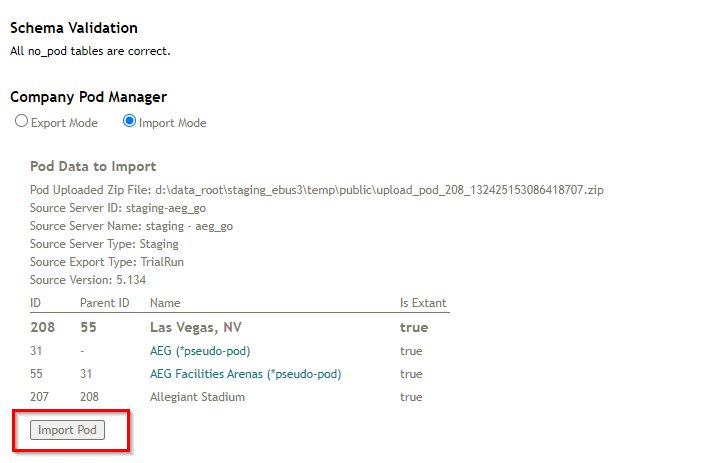
Once the process is complete it will provide you a list of any errors (run them by Rob or Alex) and it will also give you a link to go to the new company page.
The company should already be active with the calendars and users active. Do note that you will need to send out new passwords for the users who are testing this data.
THE FINAL RESTORE ("Final Pod")
Once you have designated a cut off time with the client you will want to follow the procedure above for the backup but this time use the TWIXT server to obtain their live data. Then you will be ready for the restore.
As the POD restore process can impact the operation of our live servers it is not possible to start the restore from the normal production servers. Instead, you must use a corresponding TWIXT server. Here is the link to the main page:
http://twixt-list.ebconnection.com/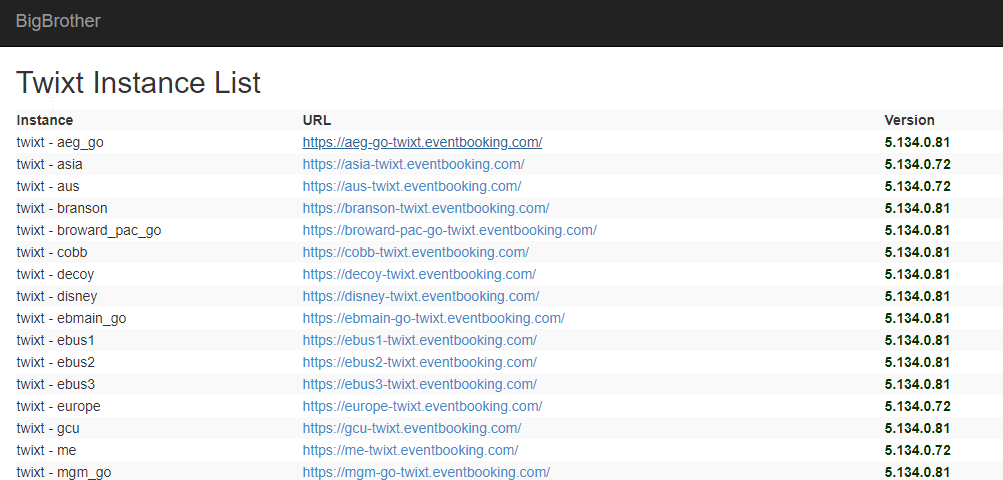
IT IS RECOMMENDED TO PERFORM THE FINAL BACKUP AND RESTORE AFTER HOURS WHEN THE SERVERS ARE NOT IN ACTIVE USE!
Make sure to run another test pod using the Twixt instance. Use the Trial Run for the backup NOT the Final Restore
From this page, you will want to select the corresponding TWIXT for the server the client resides on. For example, if the client is https://aeg.eventbooking.com then you would select https://aeg-go.twixt.eventbooking.com. The reason we use the TWIXT servers is because all of the automatic services are off on these instances so they are not trying to update or write data to the database while you are creating a backup.
Sign in and go to the Root -> Search page. Here you will find a link for the Pod Import.
As before, make sure that the Import Mode is selected, paste the URL for the final export Zip file you previously created and click the Upload button.
Verify that the import is for the correct client and import the data. Once the import is finished it will give you a list of errors (verify with Rob or Alex) and then you can click on the link to go to the company page.
The company should be active and all of the calendars and users should be active as well. Please note you will need to send out new passwords for all of the users on the account.
Comments
0 comments
Article is closed for comments.